Cleaning Carpets in Studio Flats Where You Can’t Move Furniture

Every guide to cleaning a carpet opens the same way: clear the room. Take everything out, they say, then clean the empty floor. In a studio flat that advice is worse than useless, because there is no “out”. The bed, the sofa, the little kitchen table and the wardrobe are all in the one room, within about four steps of one another, and the only place to put the wardrobe is on top of the bed. No spare room, no garage, no hallway to stack things in.

So how do you clean a carpet you can’t uncover? You give up on cleaning all of it – and you change the method to suit a room you also have to sleep in tonight.

Why doesn’t the usual advice work in a studio?

Two constraints, and they pull in the same unhelpful direction.

The first is space. There’s nowhere to move the furniture to, so you can’t expose the whole floor at once – some of it is permanently pinned under something heavy. The second is occupancy: you live in this room. You can’t shut the door on a wet carpet and go and sleep elsewhere while it dries, because there is nowhere else, and the bed is right there in the damp with you.

Ordinary carpet cleaning assumes both problems away. It assumes an empty room, and a household that can decant to the rest of the house while the floor dries. The kind of ex-bedsit conversion where a whole Victorian house in Whitechapel became eight studios, each its own sealed little world, grants you neither.

The drying problem you can’t design around

This is the one that catches people out. Wet a carpet in a normal room and you open the windows, shut the door and leave it overnight. Wet the carpet in a studio and you’re sleeping eighteen inches above it, in a sealed box with one window – often a sash painted shut two tenants ago – while it dries. The moisture has nowhere to go but into the air you’re breathing, and by morning the whole room smells of damp wool and the inside of the glass is running with condensation. Whatever else you do in here, you keep the water down.

What actually needs cleaning – and what can you happily ignore?

Most of your floor doesn’t need cleaning at all. That’s the shift that makes the whole thing manageable.

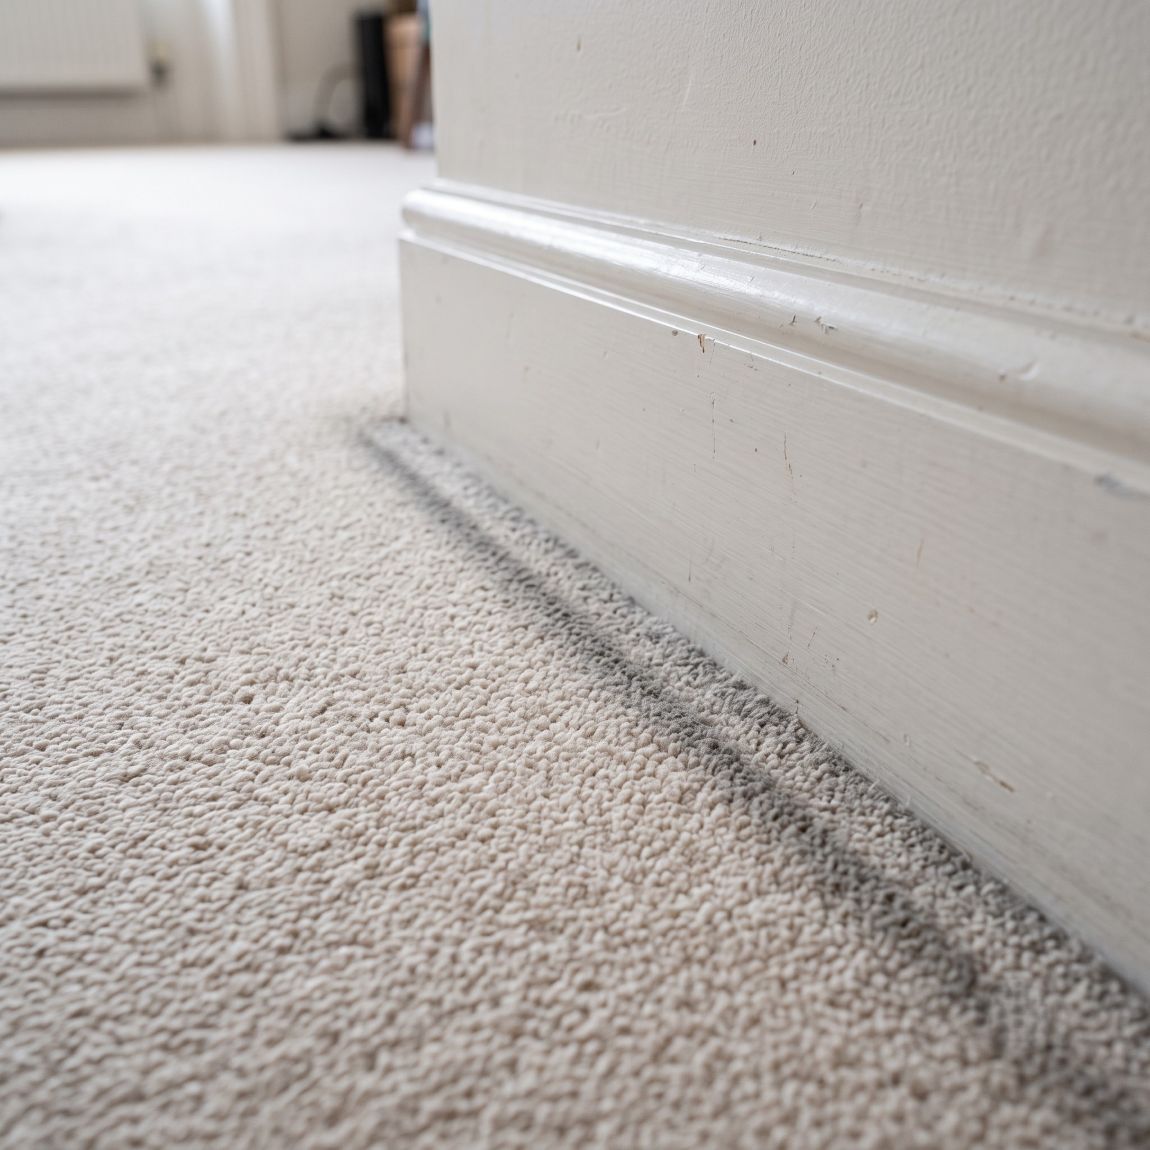
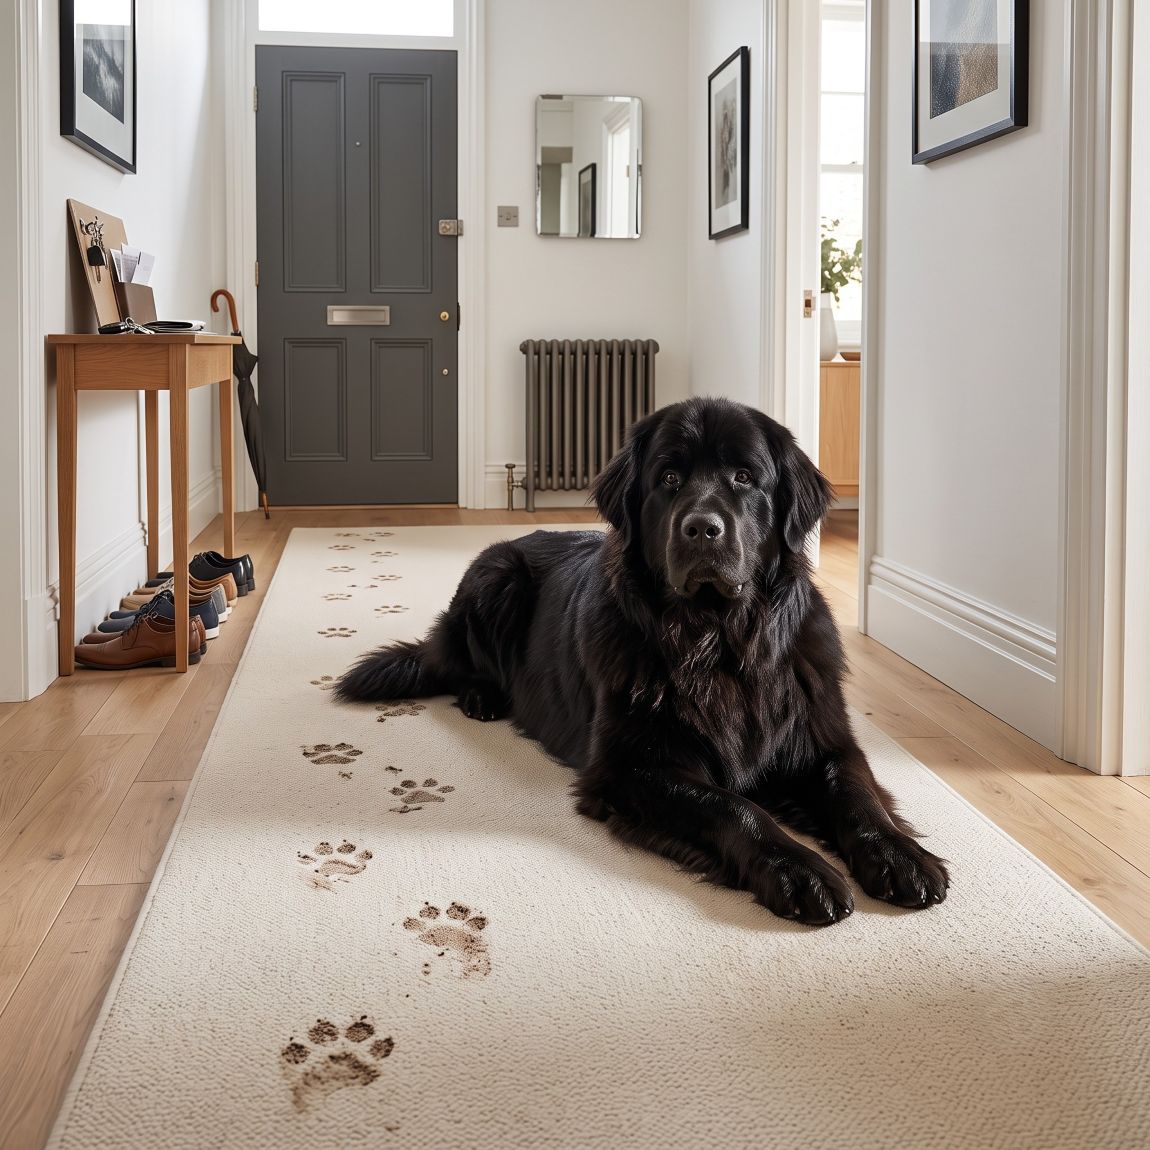
Think about where the dirt actually is. Carpet gets dirty where feet go, and in a studio feet go along a handful of narrow, predictable routes – the door to the kitchenette, the front of the sofa, that half-metre beside the bed where you stand to pull your socks on, maybe the line to the window. Those lanes take all the wear and hold all the soil. The carpet under the bed and the wardrobe, and behind the sofa – most of the floor by area – gets walked on by nobody and seen by nobody. It’s as clean as the day it was fitted.

The flip side is that the lanes in a studio cop far more than a normal room’s ever would. You cook, eat, work and sleep inside the same few square metres, so every activity’s mess lands on the same short stretches of carpet. The strip in front of the sofa, where you eat your dinner off your lap most nights, takes the kind of food drips a proper dining room would spread thinly across a whole floor.

So clean the lanes. Ignore the rest, and don’t feel guilty about it.

I’ve watched people haul a divan off the wall and half-kill themselves to clean a patch of carpet that no human eye will see again until they move out, a patch that wasn’t dirty in the first place. It’s effort poured into the one part of the room that never asked for it. In a space this size, cleaning the twenty per cent that gets used is the whole job, done properly. The rest was never the point.

Mapping the lanes

Get down low and look at the pile in a raking light – a lamp held to one side, beam skimming across the surface. The worn, greyed tracks show up at once: the runway from the front door, the arc your feet scuff in front of the sofa, the pale patch under the desk chair where the castors have ground a season of biscuit crumbs and street grit into the weave. Those are your targets. Anything the light still shows as upright and springy, you leave well alone.

How do you clean around furniture you genuinely can’t shift?

The trick with what you can move is the shuffle. Pile the small, liftable things – the chair, the side table, the laundry basket, the drying rack – onto the bed, clean the floor you’ve just freed, let it dry, then move it all back and do the next stretch. You work the room in halves, with the bed as your holding bay. It’s slow and faintly ridiculous, and it works.

For the genuinely immovable – a packed wardrobe, a divan you can’t lift on your own – clean up to the edge and stop. If you’re using any moisture at all, slip a square of kitchen foil or a plastic coaster under any wooden or metal foot that’s sitting on damp carpet, or the leg can bleed a rust or dye mark into the pile that outlasts the whole clean. Then leave what’s underneath to stay its clean, undisturbed self.

Individual marks in the lanes get treated one at a time. A dropped-curry blotch, the greasy dark patch by the door where shoes come off – you work each with a damp cloth and a little solution, blotting rather than soaking, so you’re wetting a coaster-sized spot instead of the whole room. It dries in minutes. A dozen small damp patches you can manage; one soaked floor in a sealed room you cannot.

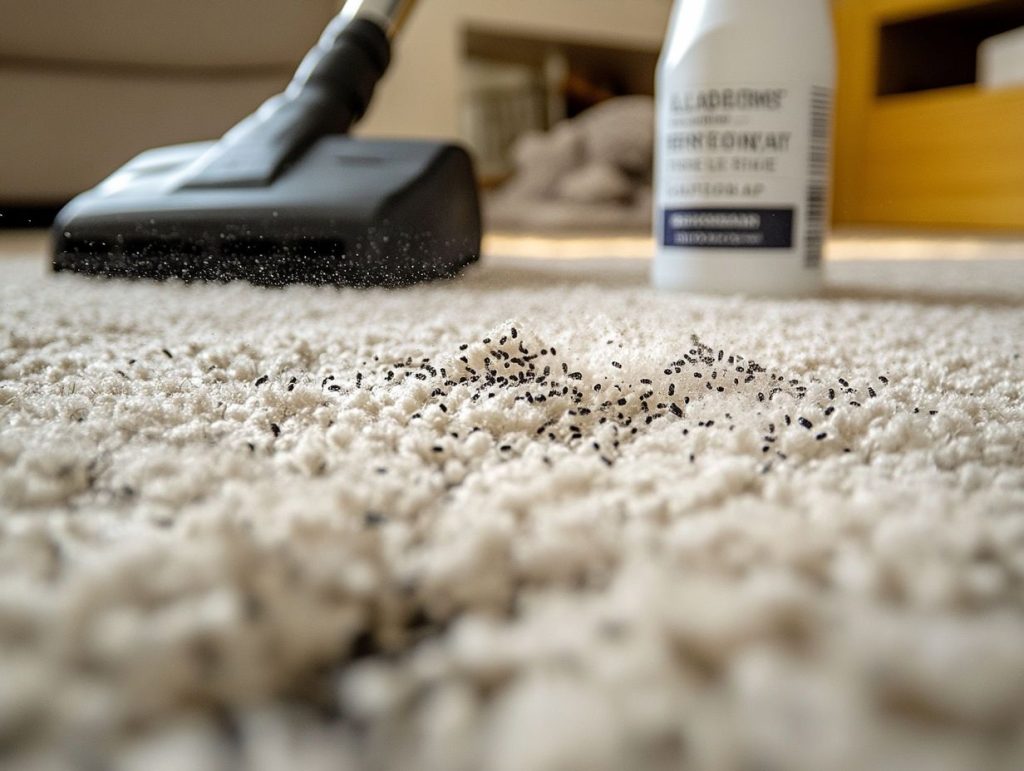
Do the boring thing first: vacuum like you mean it

Before a drop of anything wet comes near the carpet, vacuum. Properly.

Most of what’s in a studio carpet is dry – grit, dust, dead skin, crumbs, the fine street dirt that rides in on your shoes off the pavement outside. A thorough vacuum lifts the bulk of that and adds not a drop of moisture. Do the lanes slowly, several passes each, and get the crevice tool right into the edges and hard up against the skirting and the furniture bases, where the vacuum head can’t reach and where the dust quietly banks up. Half the visible improvement in a tired studio carpet is nothing more than a proper vacuum the lanes haven’t had in months.

Why is hot water extraction usually the wrong pick here?

Because it soaks a room you have to live in tonight.

The powerful hot-water machines – the ones the trade runs, and the ones you can hire from the supermarket – drive a lot of water into the pile. In a house that dries fast, fine. In a one-window studio you’ll be sleeping in within hours, that water hangs in the air for days and the room turns dank and cold. This is the specific reason I’d tell you not to lug a Rug Doctor up three flights to a studio: it’s a decent machine misused, wetting a space that has no way to dry itself out.

Low-moisture cleaning is what a studio actually wants. It leaves the carpet dry within the hour, so the room is yours again by the evening. You give up a little deep-flushing power in exchange. In a room you can’t vacate, that’s a swap worth making every single time.

The low-moisture options in plain terms

Encapsulation uses a detergent that dries into brittle crystals around each fleck of dirt; you work it in, let it dry, and vacuum the crystals – and the trapped soil – out the next day. Dry-compound cleaning brushes a barely-damp absorbent powder through the pile, and you hoover it back up carrying the dirt with it. Neither soaks the carpet. Both leave a studio walkable the same night, which is the one thing a studio genuinely needs.

What about the bits trapped under the bed or the sofa?

Mostly you let them be. Not always.

A divan sitting flat on the carpet is the classic studio case: you couldn’t clean under it without two people and a plan, and you don’t need to, because nothing gets under a divan to make it dirty. Same with a low sofa. Leave them.

There’s one quiet caveat with a divan, mind. In a studio that runs humid, the carpet sealed beneath a base that never once lifts can hold damp against itself for months on end, which is a slow trouble all of its own. That’s a ventilation problem rather than a cleaning one, and the fix is getting some proper air into the room.

The exception is when something has gone wrong under there – a drink knocked and rolled beneath the bed, a cat that found itself a private corner, a damp patch you can smell but can’t locate, something spilled weeks ago and forgotten. Lane-cleaning won’t touch any of that, and no amount of working around it will either. That’s the point where the furniture has to come out regardless, studio or not. Either you rope in a friend and a Saturday morning, or you get someone in who can lift and hold a divan while the carpet underneath is cleaned and dried before it comes back down.

When the smell decides for you

You’ll know by nose. A studio is small enough that a sour patch under the bed doesn’t stay hidden the way it might in a big house – the whole flat is wearing it within a day. Once you can smell something under there, cleaning the lanes is beside the point, because the source is under the furniture and the furniture is now the job. That’s the moment to stop being clever about working around it.

When Is Hot Water Extraction The Wrong Choice For Your Home Carpet

Hot water extraction is the best way to clean most carpets. It’s also the wrong way to clean some of them, and you won’t often hear a cleaning firm admit as much, because it’s the method most of them are built around – the van and the truck-mount are set up for it and nothing else.

The instinct behind it is that a deep clean means plenty of hot water driven in and sucked back out. For a grubby nylon carpet in a house that dries well, that instinct is dead right. For a sisal stair runner, or a wool Wilton in a basement flat that never quite dries out, the same machine does damage you can’t undo. So the question worth asking is a narrower one: when is it the wrong tool for what’s actually on your floor?

What does hot water extraction actually do to a carpet?

A hot detergent solution is pushed into the pile under pressure, worked in, then dragged straight back out by a powerful vacuum that takes most of the water and the loosened soil with it. Done well, it lifts more ground-in dirt than any other method going, which is why it’s the industry default and why the standards bodies point to it for most synthetic carpet.

There’s a wide spread of kit behind that one label, too. A van-mounted machine heats harder and vacuums far more water back out than a small portable one lugged up three flights of stairs, so the very same “hot water extraction” can leave your carpet noticeably wetter or drier depending purely on what the firm carried in through the door. Same name on the invoice, two different jobs.

But notice the one thing it always does, however skilled the operator: it wets the carpet.

Everything that follows hangs on that single fact. Whether your particular carpet can take being wet, and whether your particular room can then get it dry again fast enough – those two things decide whether the method is right or ruinous, and they’ve got very little to do with how much dirt comes out.

The “steam cleaning” name is a red herring

Half the confusion starts with what people call it. Steam cleaning, they say – and it isn’t steam, it’s hot water, well below boiling by the time it reaches the fibre. The myth riding along with the name is the harmful one: that more water means a deeper clean. Up to a point, on the right carpet, more flow does lift more soil. Past that point, on the wrong carpet, more water is just more damage, and none of it cleans a fibre that’s busy swelling.

Which carpets should never meet a hot water machine?

Start with the plant fibres, because they’re the clearest case.

Sisal, jute, seagrass and coir are cellulosic – made from plant matter – and they drink water. Wet them and they swell, and as they dry they shrink and pull out of shape, and they throw up brown tide-marks that don’t come out. A sisal stair runner given a proper hot-water clean can come back rippled and discoloured along every edge, permanently marked where the water pooled and sat. I watched a handsome seagrass runner up a Georgian staircase in Islington get written off by precisely this – one over-enthusiastic clean, and it never lay flat on the treads again. These fibres want a dry method, full stop. If a cleaner turns up to your sisal with a truck-mount hose in hand, that’s your cue to walk them back out to the van.

Wool is subtler. Good wool carpet can take hot water extraction, but it has to be low-moisture, wool-safe chemistry, dried quickly – a soaking is out of the question. Older wool especially, because a great deal of it sits on a jute backing, and that jute drinks water and browns exactly the way the sisal does, bleeding a yellow-brown up through a pale wool pile from underneath. A Victorian-terrace bedroom carpet – wool face, jute back, thirty-odd years down – is just the sort of thing an over-wet clean quietly ruins from below while it looks perfectly fine on top for a day or two.

Loose-laid rugs and runners are a hazard of their own, whatever the fibre. A carpet stretched onto gripper rods dries roughly in place; a rug sitting free on the floor can shrink unevenly and curl its corners as it goes, and an old hessian-backed one can simply come apart, the backing letting go of the pile. That’s delamination, and there’s no gluing it back together. Anything not fixed down wants lifting and cleaning flat somewhere it can be watched, rather than blasted where it lies.

Why sisal and jute “brown out”

The browning is permanent, and the mechanism is plain enough. Plant fibres carry natural tannins and sugars. Soak them and those compounds dissolve, then ride the water upward as it dries and wicks to the surface, concentrating there as yellow-brown staining – cellulosic browning, in the trade. Once it’s set into a natural fibre, it’s largely there for keeps. Which is why the “we clean everything the same way” outfits are a menace to a sisal floor.

What if the carpet’s fine but your home can’t dry it?

This is the one people underrate, and it’s where a technically decent clean turns into the smell you’ll be ringing someone about a fortnight later.

Hot water extraction leaves the carpet damp. Not soaked, when it’s done properly – but damp, and it needs to dry within a day or so. In a well-aired house in June, windows thrown open and air moving through, no trouble at all. In a lower-ground-floor garden flat in a Victorian terrace, in February, with one small openable window and no through-draught, the carpet can sit damp for three or four days. That’s the window mould needs to take hold, and the whole room goes musty with it.

The rough test is honest airflow. Open the window, hold your hand to the gap, and if you can’t actually feel air moving, the room won’t shift that moisture on its own – and a damp period flat with the trickle vents painted shut certainly won’t. A dehumidifier and a fan or two change the sums entirely, and any cleaner worth booking will tell you to run them for a day after. Skip that, and you’re trusting the carpet to dry by wishful thinking.

So in a poorly-ventilated London flat, the carpet is only half the sum. The other half is whether the room can dry it before it turns – and if the honest answer is no, then the best method on paper is the wrong one in practice.

The wicking that brings old stains back

Slow drying does something else, too. As a carpet dries sluggishly from the base upward, moisture rises through the pile and drags dissolved spill residue and old soil up with it, resurfacing as brown blooms right where you’d thought the stain was gone for good. You cleaned it, it looked flawless while wet, and by the time it dried there was a ring back. A carpet that dries in hours rarely does this. One that takes days nearly always will.

Isn’t more water just a deeper clean?

No – and that belief has wrecked more carpets than any spill.

For heavy, ground-in soil in a synthetic carpet, you do want the flushing power of full extraction. But a lot of carpet cleaning is maintenance: lifting the general dulling grime off a carpet that isn’t truly filthy. For that, low-moisture methods clean beautifully and dry in under an hour. Encapsulation is the good one – a detergent that crystallises around each speck of soil as it dries, so the dirt goes brittle and vacuums straight out the following day. On a moisture-shy carpet, or a lightly soiled one that only wants freshening, it’s frequently the better call outright.

Bonnet cleaning I’m far less kind about. A spinning absorbent pad worked across the surface, it cleans the top of the pile and leaves the base untouched. Lean on it too hard and it distorts loop and cut pile, and it can leave a residue that has the carpet re-soiling within weeks. It earns its keep in quick commercial touch-ups. In a home, with a carpet you actually care about, I’d sooner do almost anything else.

When encapsulation earns its place

Maintenance cleans and quick turnarounds – an office, or a lettings changeover where the carpet has to be walkable within the hour – plus anything too moisture-shy for extraction to be safe. It won’t rescue a decade of ground-in filth; nothing low-moisture will. It’s a surface-to-mid clean rather than a deep one – run a truly filthy carpet through it and all you get is a fresher-looking filthy carpet. For keeping an already-decent carpet decent, though, it’s quietly excellent and I reach for it more than people expect.

So when is hot water extraction the right call?

None of the above is an argument against the method.

On a well-fixed synthetic carpet – nylon or polypropylene – in a home that can genuinely dry it, with real ground-in soil or the aftermath of a dog to shift, hot water extraction is the best clean money can buy, and it’s exactly what I’d book. Owning the machine is the easy part; any firm can buy one. The skill is in knowing the handful of jobs where you leave it switched off.

The questions a good cleaner asks before switching it on

Before the hose comes off the van, a decent cleaner wants to know three things about your carpet: what the fibre is, what the backing is made of, and whether the room can dry it inside a day. Answer those honestly and the method more or less chooses itself. And if the person about to clean your carpet doesn’t think to ask, that tells you something too.

Why Black Lines Appear Along Skirting Boards: Filtration Soiling

A subtle but clearly visible greyish filtration line runs continuously along the very edge of a light beige, off-white or pale cream fitted carpet in a standard, lived-in Central London apartment

You spot it one afternoon when the light’s low: a dark grey line running along the bottom of the wall, hugging the skirting board, arrow-straight. It ducks under the door and picks up again on the other side. Your first thought is that the carpet cleaner missed a bit, or the dog’s been lying against the edge. So you get down on your knees with a cloth and a bit of spray, and you scrub – and the line doesn’t care. Same shade, same place, next week.

What is it, and why won’t it shift? It has a name – filtration soiling – and the short version is that you’re looking at your household air made visible. The carpet edge has been quietly filtering that air for months, and this line is what the filter caught.

Where do the black lines actually come from?

Air. Specifically, air being pushed through the carpet where it meets an edge.

Warm air and cold air are forever swapping places in a house – rising, sinking, sneaking under doors, slipping down into the gap between the floorboards and the skirting. Wherever that moving air has to squeeze through the carpet to get where it’s going, the pile does what any fibrous mat does to passing air: it filters it. The air goes through. The fine muck it’s carrying does not. It’s caught on the fibres, right at the edge, and it builds up – grain by microscopic grain – until months later there’s a visible grey band tracing the exact run of the skirting.

That last word is the giveaway. Exact. Filtration lines are dead straight and they follow the building rather than the foot traffic – tight against the skirting, in a clean stripe under every door, along the front lip of each stair. Dirt you tread in is blurry and random, heaviest where people actually walk. This is ruler-straight and heaviest where nobody walks at all, which is your first clue that it isn’t ordinary soil.

Why it lines up with the skirting board so precisely

The precision comes from the gap. In most homes, and nearly every Victorian terrace with a suspended timber floor, there’s a void under the boards and a small gap where the carpet edge meets the wall. Pressure differences between the warm room and that cold void – driven by the heating, by draughts, by the stack effect in a tall house – pull room air down through the carpet edge and into the gap, constantly. The carpet sitting over that gap becomes a permanent, unpaid air filter that nobody ever changes. Give it a few years and the result is simply inevitable.

The doorway is usually the worst of it, and for the same reason. A closed internal door forces all the air moving between two rooms through the one narrow slot underneath, and the carpet in that slot filters the lot. It’s why the line so often darkens as it approaches a door and fades a little in the open middle of the room, where the air isn’t being funnelled through anything.

What’s in the line – and why is it greasy rather than gritty?

Run a white cloth along it and you don’t come away with grit. You get a greasy grey-black smear. That texture is the whole story.

The particulate is fine – much of it sub-micron, far smaller than any dust you can see – and a lot of it is oily. Frying sends a fine aerosol of grease into the air every time. Candles, open fires and wood burners throw out soot. Outside, London air does the rest: diesel particulate off the traffic drifts in through every gap, and if you’re on a main road – the sort of terraced street where the buses idle at the lights – your indoor air carries a steady load of the stuff. Add skin cells, carpet fibres, the odd trace of printer toner, and you’ve a greasy sub-micron dust that bonds to fibre and won’t let go.

The oil is the reason it clings. Grease makes the soot stick, and it glues the whole deposit to the pile in a way dry dust never manages.

If it helps to picture it: the black stripe by your skirting is partly the same fine diesel soot the air-quality monitors on the main roads are there to measure. The carpet edge is doing a slower, dirtier version of the same job, and keeping the evidence.

The candle habit nobody wants to hear about

Here’s the part people push back on: scented candles are one of the worst offenders in a modern home, and the cheap paraffin ones are the worst of those. That three-wick you burn every evening through the winter is putting a fine soot into the room air for hours, and a good share of it ends up filtered straight into the carpet edge by the nearest door. People find this genuinely hard to swallow – the candle smells lovely, the room feels cosy, and the black stripe by the skirting seems like a separate matter entirely. It isn’t a separate matter. If your lines got noticeably worse over a winter of nightly candles, there’s your culprit, and no, you won’t enjoy hearing it.

Why won’t it just vacuum or scrub out?

Because none of the things you’d normally do to a carpet touch this kind of dirt.

Vacuuming glides straight over it. The particles are too fine and too firmly bonded for suction to lift – the vacuum takes the loose surface dust and leaves the soot welded to the fibre. So you reach for a spray and a cloth, and that’s where it gets worse, because your ordinary carpet spray is water-based and the deposit is grease-bound. Water-based cleaner on a greasy line does two unhelpful things at once: it smears the deposit sideways into the clean pile beside it, spreading the mark out into a grey haze, and it presses some of it deeper. You scrub, you get a bit of grey on the cloth, you feel like you’re winning – and what you’ve done is push the edge of the problem into carpet that was perfectly fine an hour ago.

Shifting it properly means a solvent to break the grease first, then agitation to work the freed particulate up out of the pile, then hot water extraction to flush it away before it can resettle. That’s a different job from lifting a spill, and it’s exactly why the line you’ve been going at with a household bottle has never once budged.

The honest bit about whether it fully comes out

I’ll be straight, since plenty of adverts won’t: a fresh filtration line, caught early, usually cleans up well. One that’s been building along a skirting board for eight years might never come out completely. The fine particulate can work so far down into the base of the pile and the backing that it becomes, in effect, part of the carpet’s colour. Any cleaner promising a guaranteed 100% result on a decade-old line is overselling you. A big improvement, yes. A flawless one, not always – and when it falls short, that’s the carpet, not the cleaner letting you down.

Which rooms and houses get it worst?

Some homes are practically built to grow these lines.

Rooms with candles, an open fire or a wood burner make the most soot, so they show it first – usually the lounge. Kitchens get the greasy cooking version. Any house with draughty suspended timber floors, which is half the Victorian and Edwardian stock in London, has the gaps and the underfloor void that drive the airflow in the first place. Forced-air heating or a boiler that’s overdue a service pushes more particulate around the rooms. And a house sitting on a busy road simply starts with dirtier air coming in.

The staircase that acts like a chimney

Tall, narrow London townhouses get a special version of this. A four-storey house with the staircase running up its spine behaves like a chimney – warm air rises up the stairwell and has to be replaced by air drawn in lower down, and that steady vertical current is pulled through the carpet at every stair edge and every landing skirting on the way up. It’s why filtration lines on staircases are so common and so stubborn: the airflow driving them barely stops. Look along the front edge of each tread. A dark line on every single one, lined up floor to floor, is the stack effect drawing its own diagram.

Can you get rid of it – and stop it coming back?

Two separate jobs, and the second one matters more than the first.

Removal is a professional degrease-and-extract, as above, with expectations set honestly by how long the line’s been sitting there. Prevention is where you actually win, and it comes down almost entirely to the source. Burn fewer candles, and better ones if you must have them. Use the extractor fan or crack a window when you fry. Get the boiler and any forced-air system serviced. A decent air purifier with a proper filter takes a real bite out of the airborne load in the room it’s standing in. And if you’re mid-renovation with the carpets lifted, sealing the gap along the skirting and floor edge closes off the very route the air takes through the pile.

You won’t stop it dead in a leaky Victorian terrace on a bus route. The air keeps moving and the gaps are still there, with the road right outside. But you can slow it from a line that’s obvious in three years to one that takes fifteen to show.

The one change that does the most

If you do nothing else, tackle the biggest soot source in the room. Nine times out of ten that’s the candles, and cutting the nightly ritual back to the occasional one does more for the skirting line than any amount of scrubbing ever will. Unglamorous and mildly annoying – and the single most effective thing on this entire list.

Why Enzyme Cleaners Are the Only Thing That Removes Dog Urine Smell

You’ve cleaned the spot. Scrubbed it, sprayed it, dabbed it, stood back satisfied. For a fortnight there’s nothing – and then one muggy August evening you come home to a London flat with the windows shut and it’s there again, that unmistakable sharp tang, rising off a patch of carpet that looks completely clean.

So why won’t it die? And why does every forum, vet and dog trainer eventually tell you the same thing – buy an enzyme cleaner? Because you’ve been cleaning the wrong thing. The real source of the smell soaked in months ago and has been waiting, quite patiently, for a damp day.

Why does the smell keep coming back on warm days?

Because the compound behind it doesn’t wash out, and it wakes up with humidity.

Dog wee is a cocktail. There’s urea, there’s urochrome (the yellow), there’s a slew of salts and hormones, and there’s uric acid. Most of that list is water-soluble – which is why a scrub with soapy water lifts the colour and knocks back the fresh sharpness, and why you think you’ve won. You’ve removed the easy parts.

Uric acid is not one of the easy parts. It forms crystals that are essentially insoluble in water, and those crystals bind hard to whatever they land on – carpet fibre, the underlay below, the floorboards below that. Soap won’t dissolve them. Water runs straight past. They just sit there, locked into the pile, giving off very little – until the air gets damp.

That’s the part that drives people mad. Uric acid crystals are hygroscopic: they pull moisture out of humid air, and when they take on that moisture they release the smell all over again, as pungent as the day the dog squatted. A dry winter flat with the heating on can seem cured. Then July arrives, or a wet week, or you dry the washing on a clotheshorse in the same room, the humidity climbs, and the crystals reactivate. The smell was never gone. It was dormant.

What’s actually in the wee – and which bit is the problem

Break the puddle into its parts and only one of them is a real long-term problem. Urea feeds the bacteria that produce the ammonia reek, but urea itself rinses away. Urochrome stains but rinses. The salts rinse. Uric acid is the one that stays, the one that crystallises, the one that comes back. Solve the uric acid and the smell is solved. Ignore it and nothing else you do lasts.

Why doesn’t soap, water or a good scrub get rid of it?

Two reasons, and the second is worse than the first.

The first you already know: soap and water don’t touch uric acid crystals. Fine.

The second is depth. When a dog urinates on carpet the liquid doesn’t politely stay in the top of the pile. It sinks – through the carpet, into the underlay, often down onto the subfloor – and spreads sideways as it goes. A puddle the size of a saucer on top can be a dinner plate by the time it reaches the boards. Your cloth, your spray, your scrubbing brush all work on the top half-centimetre. The reservoir of smell is sitting two centimetres down where nothing you’re doing reaches it. You’re wiping the lid of the tin.

The depth you can’t see

In a Victorian terrace with the original pine floorboards, it’s worse again – the wee runs down between the boards and soaks into their edges and the gaps, somewhere no carpet cleaner, enzyme or otherwise, can easily follow. That’s where a spot stops being a spot and becomes a job.

What makes enzyme cleaners different?

An enzyme cleaner eats the uric acid – digests the crystal down into molecules too small and too simple to smell of anything.

It carries specific enzymes – uricase and urease chief among them – and usually a population of harmless bacteria that keep producing those enzymes as they work. Enzymes are catalysts: molecular tools that grab hold of one particular compound, snap it into smaller pieces, then move on and do it again. Point a uricase at a uric acid crystal and it takes the thing apart into carbon dioxide and water and a whisper of ammonia that gases straight off, none of which smells of anything.

The distinction is the whole point. Every other method masks the smell, or lifts the soluble bits around it, and leaves the actual crystal sitting there for the next humid day. An enzyme cleaner destroys the molecule that makes the smell. Once the uric acid is genuinely broken down there’s nothing left to reactivate, which is why it’s the one approach that ends the cycle rather than pausing it.

How the enzymes break it down

You don’t need the biochemistry, but the shape of it tells you how to use the stuff. The enzymes have to physically reach the uric acid and stay wet long enough to work on it – a dried-out enzyme is a stalled one, and catalysis was never quick to begin with.

Then why do so many people say enzyme cleaners didn’t work for them?

Because most of them used it like a spray-and-wipe, and used like a spray-and-wipe it does almost nothing. This is where enzyme cleaners get a reputation they don’t deserve.

Two mistakes account for nearly all of it.

Not enough of it. The cleaner has to reach everywhere the urine reached. If the wee soaked two centimetres down and spread across a dinner-plate area, a polite misting of the visible mark leaves most of the uric acid completely untouched. You have to soak the spot – properly, generously, until it’s as wet as the original accident was, down into the underlay. Timid application is wasted application.

Not enough time. Enzymes work slowly. Ten minutes and a blot is nowhere near it. Most need to stay wet on the spot for hours, some overnight, which means laying a damp cloth or a sheet of plastic over the top so it can’t dry out while it works. Impatience is the single most common reason they seem to fail.

The mistakes that quietly kill the enzymes

Enzymes are alive-ish and fragile, and there are a few ways to destroy them without noticing.

Cleaning with something else first is the sneaky one. Detergent residue, disinfectant and anything with bleach in it will denature the enzymes on contact – you’ve killed the tools before they start. If you’ve been dousing that spot in a supermarket spray for weeks, the residue is now working against the enzyme cleaner you finally bought.

And then the big one: heat. Do not steam-clean a urine stain, ever, and don’t reach for hot water either. Heat sets the proteins and bonds the uric acid harder into the fibre – it bakes the smell in for good, and it denatures the enzymes on top of that. A steam cleaner on dog wee is one of the very few genuinely irreversible mistakes in this whole game. Cold or lukewarm, always.

What about vinegar, baking soda and the peroxide recipe?

The internet’s favourite home remedies, ranked honestly.

Vinegar first, since it’s the one everyone swears by. On fresh wee a vinegar solution does something real – the acid neutralises the alkaline ammonia and helps lift the fresh mess. On set-in uric acid crystals it does close to nothing: it can’t break them down, and the moment it evaporates the crystals are exactly where they were. Handy in the first hour, useless a week later. I wouldn’t spend a penny on the gallon jugs people recommend for old stains.

Baking soda absorbs moisture and masks odour a little. It’s a deodoriser, not a solvent, and it leaves the uric acid entirely intact. Grand as a finishing touch over an enzyme treatment. Hopeless on its own.

The peroxide recipe – hydrogen peroxide, a little baking soda, a drop of washing-up liquid – is the one alternative with real teeth. Peroxide oxidises, and oxidation does break down some odour compounds and lift colour. It’s the nearest thing to a genuine rival. But it bleaches. On a wool carpet or anything dyed it can leave a pale patch that looks worse than the stain did, and it still struggles to reach the uric acid sitting down in the pad. A risky stopgap for a stubborn spot, then – never a first move, and never on wool.

Why an ammonia-based cleaner is the worst thing you can reach for

One product to avoid outright: anything ammonia-based. Ammonia is a breakdown product of urine – it’s part of what makes wee smell of wee. Clean the carpet with it and, to your dog’s nose, you’ve just freshened up the toilet and invited them to top it up. This matters most with a nervous rescue from Battersea settling into a new flat, the sort that’ll mark the same corner for weeks. Make that corner smell of ammonia and you’ve lost the argument before you started.

When is the carpet too far gone to save?

Sometimes the honest answer is that the pile isn’t the problem any more.

If a dog has marked the same spot for months, the underlay and subfloor can be saturated to a depth where even a thorough enzyme soak from the top can’t reach the whole reservoir. At that point the fix turns physical: lift the carpet, cut out and replace the affected underlay, treat and seal the subfloor, re-lay. It’s disruptive and it’s occasionally the only thing that truly ends it. A professional treatment reaches deeper than a household one – flushing enzyme solution down to the pad and drawing it back out under extraction – but there’s a depth past which no liquid poured from above will win.

The UV torch test

Here’s how to see the real extent before you decide anything. Buy a cheap UV torch, wait until it’s properly dark, kill the lights and sweep it across the carpet. Dried urine fluoresces – old marks glow a dull yellow-green, including ones invisible in daylight. People try it for the first time and discover the staining is three times the size they imagined. A slightly grim way to spend ten minutes in the dark. Also the most useful ten minutes you’ll spend before you treat a thing.

Cleaning Carpets After a Washing Machine Leak or Burst Pipe

There’s a particular sound a soaked carpet makes when you step on it – a low squelch, water rising up around the sole of your foot – and if you’re hearing it in the hallway you already know something behind the washing machine has let go. Or the flat upstairs has. Either way there’s a dark patch spreading across the carpet and a decision to make, fast.

Can it be saved? The carpet itself, usually – wool and most synthetics come through a wetting fine if you get the water out quickly. The underlay beneath it is another matter. And what beats you here is rarely the water. It’s the clock.

How fast do you actually need to move?

Faster than feels reasonable. Mould and the musty smell that rides in with it can take hold within 48 to 72 hours in a warm room, and a London flat with the heating on is exactly that kind of room. Water travels, too. What reads as a dinner-plate stain on the surface has usually spread twice as far through the underlay and across the floor underneath, creeping along the backing where you can’t see it happening.

The pile going dry on top means nothing. Underneath, it can sit saturated for days.

What to do in the first ten minutes

Kill the water. For a washing machine, switch it off at the wall and turn the valve on the braided hose feed behind it until it shuts. For a burst pipe, find your internal stopcock – in most London terraces it’s under the kitchen sink or in the hall cupboard by the front door, though in a mansion-block flat in Maida Vale or Marylebone it might be a shared one, and you could be knocking on a neighbour’s door or ringing the managing agent. Turn it clockwise until it stops. Then open the cold taps and let the pipes drain down – there’s a surprising amount of water still sitting in the system after a burst, and it’ll keep weeping out of the split otherwise while your back’s turned.

Then get the standing water off the carpet before it sinks further in. Towels, a bucket, whatever’s to hand.

Is the water clean, or is it the dangerous kind?

This decides whether you’re cleaning up or gutting the room. Restoration people sort water into three categories, and the category is the whole diagnosis. Clean water from a burst supply pipe or an overflowing loft tank – category one – is the good outcome, near enough drinkable, low risk. Grey water comes next: used water carrying detergent, grease, food traces, a bit of bacteria. Black water is the one you don’t touch – sewage, drain backups, floodwater off the street – and that isn’t a DIY job in any sense.

The categories also creep. Clean water left sitting in a warm carpet for a couple of days doesn’t stay clean; the bacteria multiply and it drifts towards grey on its own. So even a tidy category-one burst becomes a dirtier problem the longer you leave it, which loops back to the clock again.

Why a washing machine leak isn’t as clean as it looks

Here’s the catch with the washing machine. People assume clean water, because it’s the machine that does the washing. It isn’t clean. Water standing in the drum and the sump carries detergent residue, grease lifted off clothes, loose fibres and a decent bacterial load – grey water, category two. Sitting in the carpet, it turns sour and starts to smell within a day or so, quicker than plain supply water would. A washing machine leak wants more urgency than a burst copper pipe under the sink, not less, even though the pipe is the one that sounds like a proper emergency.

How do you get the water out before it wrecks the underlay?

This is the whole game. Standing water is the enemy, all of it has to come up, and towels stop being enough the moment the water reaches the underlay.

If you own or can borrow a wet-and-dry vacuum – a real one, not a handheld – use it. Run it slowly across the carpet in overlapping passes and keep going well past the point you think you’re done, because the underlay keeps handing water back up into the pile as you clear the surface. Empty the tank. Go again. It is tedious and your back will hate you.

An unwelcome opinion while we’re here: the £40 wet-vac from Screwfix is not up to a flooded room. It helps, but it holds four litres, and a hallway that’s flooded overnight holds a great deal more than that. You’ll spend the evening emptying it into the bath. Fine for a small overflow. Hopeless for a pipe that ran while you slept.

Once you’ve pulled what you can off the top, lift a corner. Peel the carpet back off the gripper rods at the edge of the room – the thin battens with the upward-pointing spikes that run along the skirting – and fold it back to expose the underlay and the floor. Now you can see what you’re genuinely dealing with, rather than guessing at it through three-quarters of an inch of wet wool.

The bit where towels stop being enough

There’s a threshold and you’ll feel it when you cross it. Below a certain amount of water, blotting and airflow win the day. Above it – a genuine burst, an overnight leak, water welling up when you press your palm into the pile – no quantity of towelling gets the underlay dry, and ploughing on regardless just burns the hours you haven’t got. That’s the moment to bring in extraction gear or make the call.

One more reason not to dawdle, if you’ve an older wool carpet: many of them have a jute or hessian backing, and jute browns when it stays wet. The tannins leach up through the pile and leave yellowish-brown tidemarks – “cellulosic browning”, if you want the trade term – that are a genuine pain to shift once they’ve set, and sometimes won’t fully shift at all. The faster the backing dries, the less chance it has to bleed its colour up into a carpet that was otherwise fine.

Can the underlay be saved?

Usually not. I’ll say it plainly, because plenty of guides go soft here: after a proper soaking, replace the underlay rather than trying to dry it.

Foam underlay breaks down once it’s saturated. It goes crumbly and sheds little beige crumbs. The bounce is gone and it doesn’t come back. Rubber-crumb and waffle types hold water like a sponge and take an eternity to dry from the middle out, and felt underlay does the same while quietly growing something that smells. Run a dehumidifier at it for a week and you’ll think you’ve won – then in July, when the flat warms up, a low mushroom note rises through the carpet and never fully clears. Cutting the wet underlay out and fitting fresh costs less than living with that. It also costs less than replacing the carpet you rescued, once the mould finds its way up into it.

The carpet you can often save. The underlay is a consumable. Let it go.

What’s under the underlay matters too

Pull everything back and look hard at the floor. A solid concrete floor – common in ex-council flats and post-war blocks across London – holds moisture and has to be dried properly before anything goes back down, or you seal the damp in and it festers. Suspended timber floorboards, the standard under Victorian and Edwardian terraces, dry more willingly with air moving beneath them, but they’ll cup and lift if left wet. Whatever’s down there, it needs to be bone dry before you re-lay a thing.

How do you dry the carpet so it doesn’t smell?

Airflow, warmth, and patience, in that order. With the carpet folded back, get air moving – windows open if it’s dry outside, a couple of fans aimed under the lifted carpet and across the exposed floor, and a dehumidifier running in a shut room, pulling moisture out of the air so the air keeps drawing more from the fibres. That’s the loop you want: wet fibres, dry air, repeat.

Don’t crank the heating and close the door. Warm, still, damp air is precisely the thing mould thrives on.

The smell test

Your nose is the best moisture meter in the house. A faint musty, earthy note – wet-dog-ish, cellar-ish – means mildew has already got going, and it means something is still damp somewhere even where the surface feels dry to the hand. If you can still smell it after everything’s supposedly dried out, it isn’t dried out. That smell never fades on its own. It builds.

When is this a job for a professional – and your insurer?

When the water ran for hours. When it’s grey or black. When it’s come down through the ceiling from the flat above, or when you fold the carpet back and the underlay’s already turned sour. Professional structural drying uses moisture meters to find water hiding where you can’t see it, and industrial air movers and dehumidifiers to draw it out of the floor and walls as well as the carpet – which is the whole gap between dry-to-the-touch and actually dry.

And there’s the insurance angle. Most home policies cover escape of water, but they want evidence before they pay for it.

Photograph everything before you move it

Before you lift a single corner, get your phone out. Photograph the source, the spread, the soaked carpet, the pooled water, the lot – wide shots and tight close-ups both. Your insurer and any drying firm will both want to see the original state of it, and the moment you’ve mopped and lifted and set the fans going, that evidence is gone for good. A leak from the flat upstairs especially, where the claim may end up running against somebody else’s policy, tends to live or die on what you managed to photograph in the first hour.

Getting Muddy Paw Trails Out of a Hallway Carpet After Dog Walks

A large black Newfoundland dog lies comfortably and nonchalantly across the cream-coloured hallway carpet of a modern West London apartment

You open the door. The dog shakes – that full-body helicopter shake that flings water up the skirting – and before you’ve got one welly off, there’s a line of prints marching down the hall towards the kitchen. Some of them are already on the bottom stair. You know exactly what’s about to happen if you grab a wet cloth and start scrubbing, because you’ve done it before and made it worse.

So: can you actually get this out, or have you just written off the hallway carpet until spring? You can get it out. Almost always. The catch is that the thing your hands are itching to do right now is the one thing that turns a Tuesday-evening annoyance into a permanent brown ghost in the pile.

Why does London mud cling to hallway carpet so stubbornly?

Blame the ground under your feet. Most of the capital sits on London Clay, a fine, dense, faintly blue-grey stuff that turns to something like wet putty after rain. It isn’t sandy soil that brushes off when it dries. It’s sticky at a particle level, which is why the mud your spaniel drags back from Hampstead Heath behaves so differently from beach sand – it works its way between the fibres and holds on.

Carpet pile makes it worse. Each tuft is basically a tiny brush, and wet clay particles – the “fines” – lodge right down where the tuft meets the backing. Rub at the surface and you feel like you’re cleaning. You’re not. You’re pressing the fines deeper and spreading the edges of the mark outward.

That’s the whole problem in one sentence, really.

Wet mud versus dried mud – and why one is your friend

Here’s the counter-intuitive bit that most people get wrong in the heat of the moment. Dried mud comes out far more easily than wet mud. Wet clay smears; it bonds to the fibre and moves sideways under pressure. Dried clay goes crumbly and brittle, and a crumbly solid can be broken up and lifted away. The instinct to attack the mess the second it lands is, nine times out of ten, exactly backwards.

What should you do in the first sixty seconds after a wet walk?

Contain the dog. Genuinely, before anything else – a towel over the animal or a firm “wait” on the mat, because a second lap of the hallway doubles your work.

Then leave the mud alone.

I mean it. If there’s standing water or a proper wet slick, press a dry towel or a wad of kitchen roll straight down onto it – flat, no dragging – just to pull up the excess liquid. That’s the only intervention that’s safe while it’s wet. You’re lifting water, not cleaning mud. Once the visible wetness is gone, walk away and let the rest dry solid. An hour, two hours, overnight if it’s a real Heath-in-January situation. The carpet will look worse before it looks better. Trust it.

The one thing that turns a stain into a permanent one

Scrubbing wet mud. That’s it. That’s the mistake.

When you scrub wet clay, you drive the fines down into the base of the pile and out into a wider halo around the print, and no surface clean will ever reach them again – the dirt is now living below the level your cloth can touch. What looked like a tidy little paw shape becomes a vague brown smudge the size of a saucer, and it’s set. People do this constantly because doing something feels better than doing nothing, and then they ring round a week later.

How do you actually lift dried paw prints without spreading them?

This is the part that matters, so I’m going to slow right down.

Wait until every print is bone dry and crusty. Poke one – if it gives at all, it’s not ready. Once it’s properly dried, the mud has turned into a thin, brittle deposit sitting mostly on top of the fibres, and now you get to be a bit satisfyingly destructive. Break the crust up. Work a stiff brush, an old washing-up brush, or even the edge of a blunt knife across each print to fracture the dried clay into loose grit. You’ll see it turn to powder and dust. Good.

Now vacuum. Properly – go over it two or three times from different angles, because the loosened fines fall into the pile and a single pass won’t clear them. A surprising amount of the mark leaves at this stage. On a darker carpet, sometimes all of it does, and you’re done before you’ve touched a drop of water. Check before you go further, because the less liquid you introduce to a hallway carpet the better.

If a stain remains after vacuuming – and on a pale carpet it usually will, a faint tan outline where the clay stained the fibre – now you dampen. Not soak. Damp.

The blot-don’t-rub technique, step by step

Take a clean white cloth. White matters, so you can see the dirt transferring and so no dye lifts out of the cloth into your carpet. Wet it with cool water – cold or lukewarm, never hot, hot water sets protein and can felt wool – and wring it out until it’s barely moist.

Press it onto the stain and hold. Count to ten. You’re letting the moisture soften the clay bond, not wiping. Then lift straight up.

Look at the cloth. See the brown? That’s mud that’s now on the cloth instead of in your carpet. Refold to a clean face and repeat – press, hold, lift, always working from the outside edge of the mark inward so you’re shrinking the stain rather than smearing its border into clean pile. Change to a fresh part of the cloth every couple of presses. It’s slow. It’s meant to be slow.

The bit nobody tells you: know when to stop. If you keep wetting a hallway carpet you’ll saturate the backing, and then you get wicking – moisture travelling up through the fibres as it dries and carrying dissolved dirt back to the surface in a brown ring that reappears the next morning like a bad penny. Two or three damp passes, then let it dry. Come back tomorrow if there’s a whisper left.

Which cleaning solutions are safe, and which quietly wreck the pile?

For anything the water alone won’t shift, mix a few drops of plain washing-up liquid into a cup of cool water. A teaspoon, no more – too much detergent leaves a sticky residue that grabs fresh dirt for weeks afterwards. Same press-and-lift method, then a second pass with a clean damp cloth to rinse the soap out.

If a faint brown shadow lingers after everything else, white vinegar diluted about one part to four with water often lifts the last of it. Test it on a hidden corner first – inside a cupboard doorway, under the radiator.

Now the opinion you might not like: the supermarket “carpet stain remover” sprays are largely a waste of your money, and on the wrong carpet they’re a liability. Half of them over-wet the pile, some contain optical brighteners that leave a patch subtly paler than the carpet around it, and a few will happily bleach a wool blend while promising to be gentle. I’d rather you had washing-up liquid and a bit of patience than a fistful of trigger bottles from the corner Sainsbury’s. Never bleach, never undiluted anything, never hot water on wool.

Why wool hallway runners need different handling

Half the Victorian terraces in Walthamstow and Tooting have a wool or wool-blend runner down the hall and up the stairs, because that’s the period-correct thing and it looks lovely – right up until a labrador comes home from the common. Wool is a protein fibre. It hates heat, it hates alkaline cleaners, and it holds dye that some spot-treatments will strip. Treat a wool runner more gently than you think you need to. Cool water, mild soap, blot, and if you’re at all unsure, stop.

Can you stop the trail at the front door in the first place?

Not entirely. Anyone selling you a mud-free dog is lying. But you can knock the trail down to something manageable, and in a narrow London hallway – no porch, front door opening straight onto the runner, maybe a communal entrance if you’re in a flat – a bit of engineering at the threshold does most of the work.

The paw-wiping routine helps if you can train the dog to stand for it, which is its own battle.

The two-mat system that actually works in a narrow hall

One coarse scraper mat outside or immediately inside the door – rubber-backed, ridged, the kind that abrades the worst grit off the pads. Then a second, absorbent microfibre mat right behind it, the sort marketed for exactly this, long enough that the dog takes at least two full strides across it before reaching carpet. One mat cleans nothing; the dog clears it in a single bound. Two mats, sized properly, catch the grit on the first and the moisture on the second. It’s the single change that makes the biggest difference in a terraced hall, and it costs less than one professional clean.

When is it worth calling a carpet cleaner instead?

Some jobs have gone past the cloth. A set-in trail on a pale carpet that’s been walked over for days; a wool runner someone’s already attacked with the wrong spray; a mark you’ve cleaned three times that keeps coming back. That last one especially.

Professional hot-water extraction flushes water and solution deep into the pile and pulls it – along with the loosened dirt – straight back out under vacuum, which is the thing a cloth fundamentally cannot do. It reaches the fines living down at the backing, the ones your blotting never touched.

Signs the mark has wicked into the backing

Watch for this: you clean the stain, it vanishes while damp, you go to bed pleased – and by morning a soft brown ring has surfaced exactly where it was. That’s wicking. The dirt was never removed, only pushed down, and as the carpet dried it travelled back up the fibres to the surface. Once a mark is doing that, no amount of surface blotting will win, because you’re fighting something that lives underneath the part you can reach.

How Often Should You Book A Professional Deep-clean For Your Carpets And Why

We All Love That Fresh-Carpet Feel, But How Often Should You Call In The Pros?

You know the feeling. You walk barefoot across a freshly cleaned carpet and it’s like walking on a soft cloud that smells faintly of lavender and satisfaction. But let’s be honest—how long does that last before the crumbs creep in, the cat decides it’s a scratching post again, or someone spills tea while watching telly?

It’s easy to assume a quick once-over with the vacuum each week is enough. But here’s the truth: it’s not. Just because your carpet looks clean doesn’t mean it is clean. Carpets are a bit like sponges—they soak up everything from dirt and pollen to bacteria and pet dander. Over time, that hidden muck builds up, wearing down the fibres and making your carpets dull, smelly, and a bit gross underfoot.

So how often should you actually book a proper, professional deep-clean for your carpets? The answer depends on more than just time. Your lifestyle, carpet type, and location all play a part. But skipping it entirely? That’s a shortcut to faded colours, funky smells, and replacing your carpets far sooner than you’d like.

This article walks you through the why, when, and how of deep carpet cleaning. We’ll cover the science behind the professional methods, what makes them more powerful than your home Hoover, and what affects how often you should bring the experts in.


Professional Deep Cleaning vs. Your Trusty Vacuum

It’s Not Just About Suction Power

Vacuuming your carpet is a bit like brushing your teeth without flossing. It gets the obvious stuff—the toast crumbs, pet hair, and the odd bit of glitter left over from that birthday party—but it doesn’t go deep. Vacuum cleaners, even the fancy ones, mostly tackle surface dirt. That means everything settled deeper into the fibres is left behind.

A professional deep-clean goes further. These folks arrive with heavy-duty gear that looks like it means business—and it does. The two most common methods used are:

  • Hot water extraction (steam cleaning)
    This involves blasting hot water and cleaning agents deep into the carpet fibres, then sucking it all back out. It flushes out dirt, allergens, bacteria, and whatever else is lurking in there.
  • Carpet shampooing
    An older method, this involves applying a foamy cleaner, scrubbing it in with rotating brushes, then extracting the foam and grime. It’s effective for very dirty carpets but takes longer to dry and isn’t suitable for delicate fibres.

Professionals also use specialised cleaning solutions suited to your specific carpet type. They understand how different materials react to moisture, pressure, and heat—meaning you’re far less likely to end up with warped fibres or colour fading.


The Real Perks Of Going Pro

More Than Just Aesthetic Appeal

Sure, it looks nice. But the real beauty of a professional deep-clean lies beneath the surface.

1. Thorough Fibre Penetration

These machines don’t just skim the top. They get down into the base of the carpet, dislodging fine particles that grind against the fibres every time you walk across the room. That grit is a major culprit in carpet wear.

2. Elimination of Hidden Nasties

Dust mites, bacteria, mould spores, pet dander—you don’t want any of these setting up camp under your feet. A proper steam clean can help remove them, creating a healthier space for you and your family.

3. Neutralising Smells

Over time, odours cling to carpet fibres. A deep clean can strip out smells from pets, smoke, spilt wine, and even that lingering scent of takeaway curry.

4. Extending Carpet Life

Clean carpets don’t just look better—they last longer. By regularly removing embedded dirt and grime, you reduce fibre wear and avoid that sad, flat, grey look that carpets get when neglected.

5. Better for Allergy Sufferers

If you or someone in your home has allergies, professional cleaning can really help. It cuts down on pollen, dust mites, and pet allergens that love to hide in carpet fibres.


One Carpet Does Not Fit All: Type Matters

How Material Influences Cleaning Frequency

Just like your clothes, carpets need cleaning routines that suit their fabric. Different fibres hold onto dirt and moisture in different ways, and that affects how often you should go in for the deep stuff.

Synthetic Carpets (Nylon, Polyester, etc.)

These are quite durable and resistant to staining. They can usually handle a professional clean every 12 to 18 months, depending on foot traffic.

Wool Carpets

Wool is natural, plush, and sensitive. It’s also a bit of a magnet for moisture and dirt. Stick to a professional clean every 6 to 12 months, and make sure the cleaners use wool-safe detergents.

Blended Fibres

Often a mix of wool and synthetic, these need moderate care. Once a year is usually enough.

Delicate Rugs (Persian, Oriental, Silk)

These beauties need special attention. Book a deep clean every 1 to 2 years, and only with someone experienced in handling fine textiles. Too much water or the wrong technique can ruin them.

The cleaning method also varies by type. Steam cleaning might be fine for synthetics but could damage a Persian rug. A good technician will know which method suits which carpet—and which ones are best avoided.


Your Lifestyle Also Plays A Big Part

More Feet, More Fur, More Filth

You can’t really compare a quiet single-person flat in Tunbridge Wells to a hectic family home in Hackney with three kids, a Labrador, and a tortoise. Your day-to-day life has a massive impact on how dirty your carpets get—and how often they need a proper clean.

Pets In The House

Hair, dander, muddy paws, the occasional accident. Pets are lovely but messy. If you’ve got animals, think about a deep clean every 6 to 9 months—more if they shed a lot or roam freely indoors.

Kids Running Around

Sticky hands, juice spills, art projects gone rogue. Small children turn your carpet into a war zone. Go for a deep clean every 6 to 9 months to keep things under control.

High-Traffic Areas

Hallways, lounges, and stairs take a beating. These zones can need cleaning twice as often as bedrooms or spare rooms. If your whole house gets a lot of footfall, aim for a deep clean every 6 to 12 months.

Low-Traffic or Child-Free Homes

If you live alone or with another adult in a relatively clean, calm space, a deep clean once every 18 months might be enough. Still, it’s worth doing to refresh the fibres and keep allergens down.

Location and Air Quality

Living in a dusty area, near construction, or close to a main road? Your carpets soak up airborne dirt. Even if your shoes are clean, pollution finds its way in. In busy urban settings, bump up the frequency slightly.


Finding Your Sweet Spot

A Simple Guide Based On Real Life

Here’s a quick cheat sheet to help you figure out how often to deep-clean your carpets:

Carpet TypeLow TrafficHigh TrafficPets/Kids
Synthetic18 months12 months6-9 months
Wool12 months6 months6 months
Persian/Delicate Rugs2 years12-18 months12 months
Blended Fibres12 months9 months6-9 months

It’s not a strict rule, of course. Life’s unpredictable. Spills happen. Parties get wild. But it’s a solid starting point if you’re unsure.


One Final Thought—Don’t Wait For The Carpet To Look Dirty

That’s the biggest mistake people make. By the time your carpet looks grimy, the damage has already begun. Dirt wears down the fibres, settles into the underlay, and quietly ruins your floor from the inside out.

Set a reminder. Mark the calendar. Book it ahead. A clean carpet is more than just eye candy—it’s better for your health, your air quality, and your peace of mind. And that first step onto it after the pros have worked their magic? Nothing quite like it.

Should You Clean Your Carpets or Book a Cleaner? A Time Management Guide

Most people feel they can do a pretty decent job of keeping their carpets in good shape, but this is more often based on hubris than actual skill. On the other hand, professional carpet washing offers better quality, but it comes with its respective price tag. So, what is the better choice for your case?

Each option offers unique benefits that cater to different needs, whether you want to save money or achieve a pristine finish. This article breaks down the advantages of DIY cleaning versus professional services, helping you weigh factors like cost, time, and skill level.

Overview of Options

You have plenty of options for keeping your carpets clean. You can use DIY cleaning methods or hire a professional to do the heavy lifting.

Each choice has pros and cons, and figuring them out can help you make a decision that fits your schedule, budget, and cleaning goals. Whether you’re thinking about steam cleaning, deep cleaning, or just staying on top of regular hoovering, understanding the differences can make a difference in your home environment, the lifespan of your carpets, and even your overall health.

Benefits of Cleaning Your Carpets Yourself

Cleaning your carpets yourself can bring many benefits that go far beyond just feeling good about it. If you’re a homeowner searching for cost-effective solutions, DIY cleaning can save you substantial money while giving you control over the cleaning products you use at home.

Furthermore, keeping up with regular carpet maintenance not only helps your carpets last longer but also makes your home healthier by reducing allergens and odours.

By creating a cleaning checklist and managing your time effectively, you can keep your carpets looking great without spending a fortune.

Cost Savings and Convenience

One of the biggest advantages of cleaning your carpets is the significant cost savings you can enjoy. Investing in some budget-friendly cleaning products and using machines designed for carpet cleaning can keep your cleaning expenses down while still achieving great results.

Additionally, managing your carpet maintenance means you can schedule cleaning tasks around your busy life, making it a practical choice for households on the move.

This DIY approach saves you from spending money on professional services and helps you manage your budget better—especially useful if you’re watching your expenses. When you take control of your carpet cleaning, you can decide how often to clean based on what works best for you, optimising those cleaning costs even further.

This method allows you to use your resources more efficiently, as you can choose products that suit your preferences. Therefore, cleaning becomes not just another chore but a personalised experience that can lead to lasting financial benefits.

Benefits of Hiring a Professional Cleaner

While DIY carpet cleaning has advantages, consider hiring a professional cleaner for a whole new level of benefits that can enhance your home environment.

Professional cleaning services know their stuff regarding steam cleaning and deep cleaning, which can do wonders for removing stains and smells. They have the advanced tools and techniques to tackle the job and the expertise to handle different carpet types and fibres.

This means your carpets get the best possible treatment, helping them last longer and stay protected.

Quality and Time Savings

One of the most significant advantages of hiring a professional carpet cleaner is the superior quality of service you receive. These professionals use various efficient cleaning methods designed for different carpet types, ensuring every fibre is treated just right for maximum cleanliness and durability. This means you save time, allowing you to tackle other household chores while enjoying a fresh and clean space.

Their specialised tools and eco-friendly products work wonders, eliminating deep-seated dirt and allergens that your regular vacuum can’t manage. Additionally, their expertise in addressing stubborn stains or high-traffic areas guarantees excellent results, helping extend your carpets’ life.

Investing in professional cleaning creates a healthier indoor environment and enhances your home’s aesthetic appeal. So, you can relax knowing you’ve made a wise choice for your carpets and overall well-being while enjoying a thoroughly cleaned space.

Factors to Consider When Deciding

When deciding between DIY cleaning and hiring a professional cleaner, a few key factors can impact your cleaning experience.

First, consider the costs involved, how much time you can set aside for cleaning, and your skills with different cleaning techniques. You’ll also want to consider how often you need to clean your carpets and your specific cleaning goals—these will definitely play a role in your choice.

Remember to check customer reviews; they can provide great insights into how efficient and high-quality the services are from various cleaning providers, which can be very helpful as you decide.

Cost, Time, and Skill Level

Understanding the balance between cost, time, and skill level when cleaning carpets. DIY methods can be a great way to save money and give you the flexibility to fit cleaning around your busy schedule. But if you’re not exactly equipped with the right expertise or tools, it might be worth considering hiring a professional to ensure your carpets receive the proper treatment and look their best.

When considering costs, weigh the price of buying cleaning solutions and renting equipment against what professionals charge. Time management is another significant factor; if you’re juggling a packed schedule, tackling a thorough DIY clean might feel less appealing, pushing you towards those professional services.

Let’s not forget about skill level. Knowing the ins and outs of carpet fibres and stains takes a certain know-how. This knowledge not only helps refresh the look of your carpets but also extends their lifespan. By carefully considering these factors, you can make a sensible choice that meets your immediate needs while also considering the long-term benefits.

Making the Decision: Pros and Cons

When deciding between DIY carpet cleaning and hiring a professional, consider the advantages and disadvantages of each option.

DIY cleaning can save money and give you control over how you clean, but it also has risks—such as struggling to remove stubborn stains or possibly damaging your carpet fibres.

On the other hand, professional services cost more upfront. Still, they bring expert knowledge and sophisticated equipment to the fore, which enhances the cleaning power and helps protect your carpets.

Comparing the Two Options

When comparing DIY carpet cleaning to professional services, you’ll want to consider several factors, such as cleaning techniques, customer reviews, and overall investment. Indeed, DIY solutions often involve easy-to-find cleaning products. Still, they typically can’t compete with the professionals’ comprehensive methods, especially since they can access specialised cleaning solutions and equipment.

While you might appreciate the cost savings of DIY, remember the hours you’ll spend scrubbing and the risk of not achieving the best results. Conversely, professionals can use advanced techniques like hot water extraction, which outshines simple home methods.

Customer satisfaction often favours professional services. Reviews frequently rave about the effectiveness and thoroughness that trained technicians bring.

In the end, considering the long-term value of each approach can help you determine what’s best for your specific needs.

Tips for Efficiently Cleaning Your Carpets

Cleaning your carpets efficiently doesn’t have to be a monumental task. With the right tips and techniques, you can boost your productivity while reducing your time spent on this essential chore.

Using effective cleaning tools and setting up a maintenance routine makes it easy to keep your carpets looking fresh and new. This enhances your home environment and helps your carpets last longer.

Time-Saving Techniques and Tools

Time-saving techniques and proper cleaning tools enhance your carpet cleaning routine. Consider using advanced vacuum cleaners and effective stain removal products—these methods can reduce the time and effort you spend on maintenance. Furthermore, setting up a task management system can help you stay organised and ensure you tackle those cleaning tasks efficiently.

When you use high-performance carpet cleaning equipment like steam and spot cleaners, you can accelerate the deep-cleaning process while addressing every dirt and stain. A cleaning schedule lets you focus strategically on high-traffic areas, preventing grime from building up and making future cleanings straightforward.

Automated vacuums are also a game changer—they save valuable time by keeping things clean regularly so that you can concentrate on other essential chores. These methods enhance efficiency and create a healthier living environment, making regular maintenance less daunting and more achievable.

How to Clean Your Home Carpets in Under 15 Minutes a Day

Carpets can enhance the beauty of our homes, but they also accumulate dirt, allergens, and stains over time. Thus, carpet cleaning becomes essential for maintaining a fresh and inviting space and promoting a healthier living environment.

In our new article, you will discover quick and easy cleaning techniques, essential tools, and a step-by-step guide to keep your carpets looking their best. We will also share tips for preventing stains, maintaining carpets, and tackling tough stains when they arise.

The Importance of Regular Carpet Cleaning

Regular carpet cleaning is key to keeping your home clean and healthy. It not only boosts the aesthetic appeal of your space but also plays a significant role in your health by removing allergens, dust, and harmful bacteria that settle into carpet fibres over time.

A clean carpet can lift your mood, help keep your home tidy, and extend the life of your carpets. It’s a crucial part of your cleaning routine.

Recognising the importance of carpet maintenance can lead to better cleaning habits and a healthier lifestyle overall.

Benefits for Health and Home Maintenance

The health benefits of regular carpet cleaning really can’t be emphasised enough. It’s key to keeping your living space clean and cosy. By effectively removing dust, allergens, and bacteria trapped in your carpet fibres, you’re creating a healthier environment for yourself and your family, which can help reduce the risk of respiratory issues and allergies. Plus, staying on top of carpet maintenance can prolong their lifespan, so they remain vibrant and intact for years.

But it’s not just about keeping those allergens at bay; routine upkeep also boosts the overall air quality in your home. As you extract contaminants, the air gets cleaner and fresher, which is extremely important for maintaining a healthy indoor space—especially if anyone in your household has asthma or other respiratory conditions.

Proper carpet preservation techniques keep your carpets looking new and help reduce odours, bacteria, and dust build-up. By implementing regular cleaning schedules, you’re supporting your family’s health and enhancing the longevity of your home’s interior. It’s a smart investment in both cleanliness and well-being.

Preventing stains and wear

Quick and Easy Carpet Cleaning Techniques

If you’re looking for quick and easy carpet cleaning techniques to keep your carpets fresh without spending hours on them, you’re in luck.

By using clever cleaning hacks and efficient solutions, you can reduce the time and effort needed for carpet care. With just a few practical tips, you can keep your carpets looking vibrant and fit maintenance into your busy schedule.

Tools and Supplies Needed

The right tools and supplies can transform your quick carpet cleaning routine. Essential items like a carpet brush, vacuum cleaner, microfiber cloth, and effective cleaning products are key for removing dirt and keeping your carpet fresh. Equipping yourself with professional-grade cleaners and eco-friendly options makes your cleaning routine more efficient and effective.

Using a high-quality vacuum cleaner means tackling even the most stubborn dirt and pet hair lurking deep within the carpet fibres. A carpet brush is handy for lifting embedded debris and refreshing your carpet’s surface.

Plus, having various cleaning products—from stain removers to shampoos—tailored for your specific carpet materials ensures you can treat stains effectively without damaging the fabric. And don’t underestimate microfiber cloths; they’re perfect for soaking up spills and making those everyday messes a doddle to handle.

You can create a cleaner, healthier living environment without breaking a sweat with the right tools and supplies.

Step-by-Step Guide

A step-by-step guide to carpet cleaning can help you achieve the best results in no time. By following a structured approach, such as vacuuming, spot cleaning, and using a carpet or steam cleaner, you can effectively eliminate dirt and stains. This process leaves your carpet looking fresh and helps it last longer.

To start, gather all your essential supplies: a vacuum cleaner, a carpet cleaner, and a bottle of spot cleaner. Begin by giving the carpet a good vacuum to remove any loose debris; this makes it much easier to tackle the embedded dirt later on. Next, check for any stains and treat them with your spot cleaner, allowing it to sit according to the instructions.

Once you’ve done that, prepare your steam cleaner following the manufacturer’s guidelines. Just ensure you have the right amount of water and cleaning solution. Keeping an organised checklist can be extremely helpful for remaining efficient, ensuring you don’t miss any steps, and giving your carpets the revitalisation they need.

Tips for Maintaining a Clean Carpet

Keeping your carpet clean isn’t just about vacuuming now and then; it’s all about building solid carpet maintenance habits. Adding simple daily cleaning routines and adhering to a regular cleaning schedule can reduce dirt and grime.

Moreover, if you take some carpet protection measures and remain proactive, you’ll help your carpets continue looking great and last longer.

Preventing Stains and Wear

Preventing stains and wear on your carpet is key to keeping it looking its best. Effective carpet protection strategies and the right cleaning solutions—especially in high-traffic areas—can shield your carpets from pesky stains and early wear. Staying on top of spills and giving your carpets a regular groom can save you a great deal of time and effort in the future.

Placing area rugs in entryways and busy spots acts like a little gatekeeper for dirt and grime, taking the brunt of the wear off of your carpets. And don’t forget about protective sprays; they can give you an extra layer of defence against liquid spills, making cleanup a breeze without leaving any stains behind.

It’s also essential to schedule routine deep cleanings to refresh your carpets and help them last longer. Consider using carpet protectors like pads to cushion the fibres and keep them looking fresh. With these proactive steps, maintaining your carpets becomes a manageable task, helping you preserve the beauty of your home.

Regular Maintenance Tasks

Establishing a regular maintenance routine is key to keeping your carpets looking their best. Creating a cleaning checklist that includes vacuuming, carpet grooming, and periodic deep cleaning helps you stay on top. Sticking to a consistent cleaning schedule allows you to tackle dirt and allergens effectively, so you’ll have a tidy home and a clean carpet.

When spills occur, spot cleaning straight away can prevent those pesky stains from setting in. Also, don’t forget to rotate your furniture to minimise wear patterns and extend the life of your carpet. Regular professional cleaning—ideally once a year—is crucial, too, as it helps remove deep-seated dirt and revitalise the fibres.

By implementing these steps, you’ll create a solid plan for carpet maintenance, ensuring your flooring looks great and contributing to a healthier living environment. Follow this guide, and you’ll find it easy to manage carpet upkeep all year round.

Dealing with Tough Stains

Dealing with tough stains can be one of the trickiest parts of maintaining carpets. However, knowing the right stain removal techniques and having effective cleaning solutions on hand makes things much easier.

Whether you choose to use home remedies or call in the professionals, addressing those stains quickly is essential for keeping your carpets looking their best.

Common Stains and How to Remove Them

Some of the most common stains can throw a spanner in the works if you don’t tackle them immediately. To keep your carpets looking their best, you must know specific stain removal techniques for different stains—wine, coffee, or those little pet accidents. The right cleaning agents and DIY remedies can help restore your carpet to its former glory.

For example, if you spill red wine, you can start by dabbing the area with cold water, then follow that up with a mix of washing-up liquid and white vinegar.

Coffee stains? No problem. Just whip up a vinegar and water solution to break down the residue. And when it comes to pet accidents, you’ll want to reach for an enzyme-based cleaner to neutralise those pesky odours and stains.

By recognising these common challenges, you can become a stain-fighting pro and keep your carpets fresh and clean.

Alternative Cleaning Methods

Exploring alternative cleaning methods can be beneficial for your carpets and the environment. When you use eco-friendly cleaners and biodegradable products, you’re effectively getting rid of dirt and promoting a healthier home.

Techniques like carpet shampooing and steam cleaning give you more options for keeping your carpets clean while being gentle on those fibres.

Incorporating natural ingredients like vinegar and bicarbonate of soda can tackle stubborn stains and offer a safer alternative to those harsh chemicals. Plus, if you opt for methods that use less water, like dry cleaning techniques, you can help prevent mould growth and extend the life of your carpets.

Many eco-friendly products are also designed to be safe for pets and children, which is a huge relief for families. By prioritising sustainable cleaning options, you can enjoy a vibrant living space while doing your part for the planet, ensuring your carpets look great and are maintained in an environmentally friendly way.

Why Dust Mites Love Carpets and How to Get Rid of Them

Dust mites may be tiny, but their presence in carpets can lead to significant health issues, particularly for allergy sufferers. These microscopic creatures thrive in carpet fibres, making homes an ideal breeding ground.

This article explores why carpets attract dust mites like magnets, the respective health risks, and effective methods for identifying and eliminating them. It also shares prevention tips and discusses flooring alternatives that may offer allergy relief.

The Connection Between Dust Mites and Carpets

Dust Mites and Carpets Explained

Dust mites are pesky little creatures you can’t see but can feel in your carpets. They can disrupt your indoor air quality and overall household hygiene.

These microscopic pests thrive on organic matter like skin flakes and pet dander, which can contribute to allergen buildup in your living space. Since they reproduce as if there’s no tomorrow, allowing their populations to get out of hand can lead to respiratory issues and allergy symptoms.

That’s why it’s essential to understand how they’re linked to your carpets and take effective pest control measures to keep your home healthy.

Why Dust Mites Thrive in Carpeted Areas

Dust mites love carpeted areas mainly because textile fibres trap dust, organic matter, and moisture—basically, a five-star resort for these little pests. The usual humidity and warmth in homes create the perfect breeding ground for them, which helps their populations grow.

If you don’t clean regularly, this problem can get even worse. Accumulated debris and skin particles become a tasty snack for dust mites. Washing rugs frequently and deep-cleaning carpets can make a big difference in keeping dust mites in check.

Materials like wool or polyester are especially inviting since they hold more humidity than synthetic fibres, encouraging those allergens to multiply.

So, keeping humidity levels down and sticking to a regular cleaning routine is crucial for reducing dust mite presence in your living space.

Health Risks Associated with Dust Mites

You’ll want to watch out for dust mites because they can affect your health, especially if you have allergies or respiratory issues. These little pests produce proteins that can trigger allergic reactions, causing symptoms like sneezing, nasal congestion, and asthma attacks. That’s why removing allergens is essential to keeping your living space healthy.

Allergic Reactions and Respiratory Issues

Allergic reactions to dust mites can affect you differently, from mild annoyances like sneezing and itching to serious respiratory issues like asthma attacks. These allergy symptoms flare up in places filled with dust mites, which is why it’s so important to be aware of mite allergies and take preventive measures.

You should know that dust mites’ behaviour can lead to allergens accumulating in your bedding, carpets, and upholstery, making regular cleaning essential. If you’re dealing with these allergies, you might find your sleep disrupted and your productivity suffering during the day due to congestion or fatigue.

So, it’s crucial to maintain good home hygiene practices, such as:

  • Wash your bed linen frequently in hot water.
  • Using hypoallergenic covers.

Consulting with healthcare professionals for testing can help you identify dust mite allergies. This can open the door to personalised treatment options, including allergy medications or immunotherapy. Ultimately, this can significantly improve your quality of life.

Identifying and Eliminating Dust Mites in Carpets

Identifying and getting rid of dust mites in your carpets takes vigilance, and some effective cleaning methods are needed to keep those pesky infestations at bay. Regularly inspecting your carpets and using the proper mite detection techniques can help you ascertain if these little critters are lurking.

Once you know they are there, you can spring into action to reduce their populations and ensure your indoor air quality remains fresh.

Signs of Infestation and Effective Cleaning Methods

Signs of a dust mite infestation can manifest as increased allergy symptoms, visible dust bunnies, and that musty smell wafting from your carpets. To tackle this issue, effective cleaning methods such as regular vacuuming with HEPA filters and deep carpet cleaning are key to reducing dust mite populations and keeping your living space healthy.

You might find yourself sneezing more often, dealing with itchy eyes, or suffering from a blocked nose, especially after spending time in areas where these little pests have made themselves home. One clever trick to minimise these unwelcome guests is to use mite-proof covers on your pillows and mattresses; they act as a barrier between you and those pesky dust mites while you sleep.

Remember about regular deep cleaning sessions that use eco-friendly cleaners. These help eliminate allergens without introducing harmful chemicals, making your home a healthier place for everyone. Adding steam cleaning to your routine can provide an extra punch against these invisible nuisances by getting into those carpets and upholstery.

Preventing Dust Mites in Carpets

Preventing dust mites in your carpets is about adopting simple yet effective practices that lead to a cleaner, healthier home. By controlling humidity, keeping up with regular cleaning, and using specific mite prevention strategies, you can significantly reduce the chances of dust mite infestations and breathe easier with improved indoor air quality.

Tips for Keeping Carpets Clean and Dust Mite-Free

Consider a few effective cleaning solutions and strategies to clean your carpets and dust mite-free. Regular steam cleaning and using mite-proof covers on your bedding and upholstered furniture can help reduce dust accumulation and minimise allergens in your home.

Advanced vacuum technology designed to capture those pesky microscopic particles can take your cleaning game to the next level. Aim to vacuum high-traffic areas at least twice a week, while you can tackle the less frequented spaces once a week.

You can also incorporate natural repellents, like eucalyptus and tea tree essential oils, into your cleaning routine to help deter dust mites. Remember, consistent cleaning improves air quality and creates a healthier living environment by preventing the build-up of allergens.

Alternative Flooring Options for Allergy Sufferers

If you’re an allergy sufferer looking for relief from dust mite infestations, exploring alternative flooring options can help you manage those indoor allergens.

Flooring such as hardwood, laminate, and tiles are much better at resisting dust mites than traditional carpets, making your living space healthier.

Comparing Different Types of Flooring

When comparing different flooring types, aspects like dust mite resistance, cleaning maintenance, and allergen exposure are crucial in selecting the best option for your home. Choices such as bamboo, cork, and vinyl usually create less inviting conditions for those pesky dust mites than carpets.

Now, carpets can be super plush and comfortable, but if you’re not careful, they can also become a haven for household pests and allergens. On the other hand, hardwood and tiles tend to be easier to clean and don’t gather dust and debris as much.

If allergens concern you, hard surfaces might be your best friend, especially when paired with effective cleaning solutions to keep buildup at bay. But let’s be honest—you might miss carpets’ warmth and cosy vibe, which can muffle sound and create a snug atmosphere.

The challenge is balancing comfort with cleanliness, so it’s important to weigh the pros and cons of each flooring type to ensure your home remains healthy.